A spinning wheel rescue

This week I was passing through a village near my home and in the window of a house clearance shop I suddenly spotted a spinning wheel. An emergency stop ensued and I rushed to the shop window to have a closer look. To my frustration the shop was closed, allowing me time to tell myself I really did not need another wheel and I should go home quietly and find something useful to do. However, the sight of this poor forlorn, unloved wheel burned a hole in my heart and the next day I phoned to arrange to meet the owner when the shop was open.

Entering the shop full of treasures from the past I could sense this wheel needed a home. Apparently it came from the home of a lady in her nineties who had passed away and family members had cleared out the rest of the house leaving the wheel in a cupboard beneath the stairs to be salvaged by the final stages of clearance. The footman was dangling, the bobbin was full of decaying yarn and the lazy kate had no metal spokes to carry a bobbin ( a very lazy kate!). Having only ever used a modern Ashford Joy wheel I was totally unfamiliar with the workings of this traditional style wheel and had no idea if I would be able to restore it to its former glory but I decided I was feeling brave and bought it. Apparently another customer had viewed it with a plan to use it decoratively in a fireplace – a distressing thought that something so beautiful with such working potential could be cast to a life of inactivity and unused dustiness!

Carrying it through the village attracted a few comments but it squeezed nicely into the back of my car once the seats were put down and travelled to its new home.

At home I sat down to investigate this beautiful piece of woodwork. My first port of call was my dear friend of Once a Sheep , the person who was entirely to blame for drawing me over to the woolly side about 6 years ago. She would know what to do next!

The advice was lots of oil and wax. I ordered up some more bobbins and managed to fix the leather connector to the footman with a spare screw. Lots and lots of oiling of working parts has ensued and I’m layering on wax to nourish the dried out wood and obscure the water marks where it had got wet at some point. As I worked on her ( now a she rather than an it!) I was wondering about the lady who had once owned her. The scrap of yarn on the bobbin appeared to have been dyed with natural dye, possibly onion skin. Had she been a serious spinner or someone who dipped into a new hobby and gave up? Looking at the chips and knocks on the maidens and the flyer I think this wheel had been well used and loved.

Ready to run, I threaded her up and started to spin. What a joy to see it working! There is something magical about the traditional design which has been lost in the more compact modern versions. She spins like a dream and hopefully with more oil she will stop creaking completely. I can’t wait to create beautiful yarns from her and wonder if someone is looking down on me, glad that her wheel has found a happy new home.

Now all that remains is to find a place for her to live……

Spinning for hand weaving

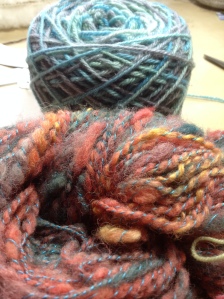
The lovely nasturtium shades which I carded were eventually spun into a wonderful unique yarn. I plied the wool with a bright turquoise thread to gove it strength and brightness. The spinning wheel which I use is made by  Ashford in New Zealand but is readily available through various outlets. I bought mine from Once a Sheep who have an online shop based in Scotland and deliver very quickly.

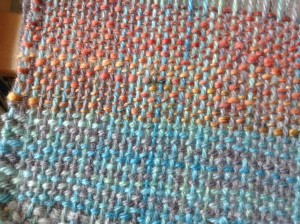
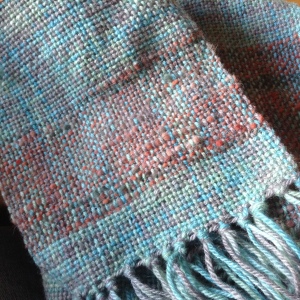
This week I’ve been weaving using this handspun wool on my little loom, a very basic one but ideal for making scarves which simply show off the lovely textures which can be obtained. For the warp I used a lovely hand dyed hank of blue faced Leicester which contained splashes of green to pick up the blue/green shades in my handspun. The joy of hand spinning is that you make up your own rules as you go along. I don’t try to achieve unformity of colour or thickness in the yarn – if I wanted that I could pick yarn from a regular wool shop. For the warp (the lengthways thread) I tend to use a machine spun thread as it is less likely to snap. I often find large cones of yarn in thrift shops and pick up ends of line in the sales too.

Here you can see that the yellow silk which I threw into the mix in random places shows up more in some sections than in others. I decided to alternate stripes of handspun with stripes of the hand dyed warp yarn to give this beautiful variegated final effect.

Katrin Eagle weaving
Ready to weave
Katrin Eagle weaving
On the loom
Katrin Eagle weaving
The finished scarf

Carding and blending wool

Looking back at all my photos of wool processing last summer makes me realise just what a slow process it all is. I felt that I had dyed a vast amount of fluffy fleece but looking at the pillowcases full of undyed fleece in my workroom cupboard makes I realise I still have a lot of work to do. Dyeing is easy enough to do in the kitchen in the winter months, but getting the fleece dry is another matter. It needs to dry fairly slowly away from direct heat sources – placing wool directly onto a hot radiator can harden the fibres and make it less suitable for hand spinning. I’m wondering if I could put up an airer in my greenhouse on a sunny day…….will have to work on that idea.

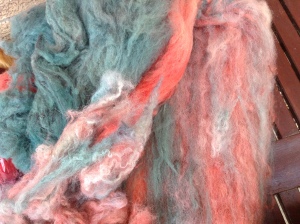
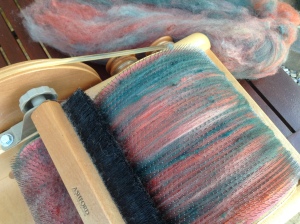
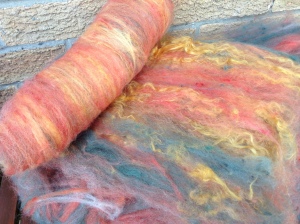
Once the wool batts have dried fullly I like to card them again to loosen the fibres. At this point I also take the opportunity to blend colours and make more interesting shades. This is what gives hand spun yarn its uniqueness but also means I find it almost impossible to duplicate a shade. The blends I made last summer were largely inspired by what was flowering in my garden at that point. The orange and green batts were the shades of the nasturtium flowers which you can see on the photo in my previous blog . To add a little zing to the colour I carded in some dyed silk from Oliver Twist in a lovely mustardy yellow.

Katrin Eagle spinning
Dried dyed batts
Katrin Eagle Spinning
Wool on the carder
Blended batt ready for spinning

Preparing a fleece

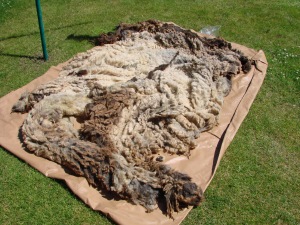
I thought I would go right back to the first steps of preparing a fleece for spinning. Last summer I was fortunate enough to get a lovely Jacob fleece from someone who owned a few pet sheep and was shearing for the first time. The first clip for a sheep is often the best as it has the lovely soft lamb wool and is also a little longer in its staple ( the length of each wool fibre). I always lay the fleece out on a tarpaulin on my lawn on a dry day. Katrin Eagle spinningWearing rubber gloves I pick off all mucky bits around the edges which were near the tail and hind legs. These can be added to the compost heap as they are excellent for adding nutrients back into the soil. Next I select the softest parts of the fleece, usually the parts on the chest and belly and put these aside. If it’s a nice clean fleece, not too weathered along the spine or tatty about the legs, I put all the fleece in together and as it’s carded and spun the varying qualities of wool from the different parts of the sheep are mixed up and blend.

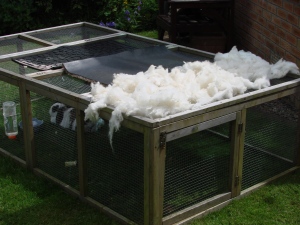
I break the fleece into several bucket-sized portions and soak in warm soapy water alternately with clean warm water until the worst of the dirt has stopped coming out into the water. After a careful spin in a salad spinner ( high speed spinning will felt the wool) I lay the fleece to dry on a rack – my rack happens to be the top of my pet rabbit run seen here.Katrin Eagle spinning After a day of sunshine the fleece is dry and ready for carding, a process I will cover in my next blog. Only then is it ready for spinning.